


 I'm really debating whether or not to combine lily and molly's birthdays. They are close enough so that the decision becomes rather difficult- almost exactly one month. I don't think most people would come to one party and then another in three weeks. And hey, my birthday is in there too! I could make Molly's one week early and lily's one week late so they weren't as close together. Ugh. I don't know but I'm going to have to decide soon. At any rate, I'm contemplating ideas and I like these very round red balloons.
  Very retro. Very large. Very eye candy. You can buy them here!
I thought about a 99 red balloons theme but Brian tells me that song is actually about Nuclear War. Am I the only one who didn't know that? I included some more party inspirational pics for anyone else in the same boat as me. Enjoy.
99 red luftballoons
Tuesday, May 13

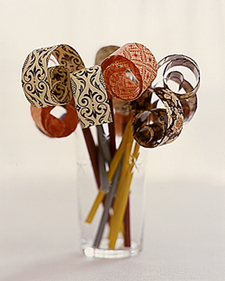

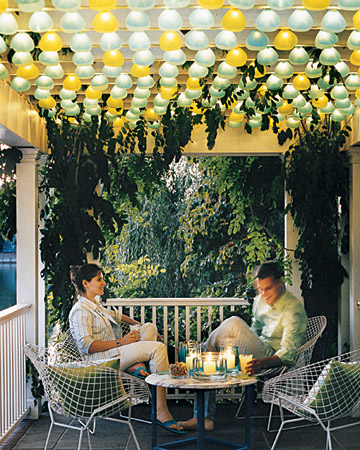


Makeover your patio without hiring a contractor
Thursday, May 8

Ikea also sells something like this for a more affordable price at a little over $3 per square foot. However, they don't have interlocking bottoms so I don't know how you would keep them in place if you didn't have anything to hold them together. But you can buy them at select Ikeas. Check it out here!
Another great invention for the DIYer is vinyl wood planks. Wait, don't stick up your nose at them just yet. Yes, they are vinyl but not the shiny fake looking kind they made in the 80s. These are wide 3 feet by 4 inches. So they lay like real wood planks plus they have the texture of wood and have a matte finish. Each plank has a sticky backing to them so there is almost no prep work involved. I installed these in my father's kitchen in one evening by myself. All of the people who saw it thought it was wood laminate. This too comes in a variety of prices and qualities but I bought my Novalis planks at Lowes for $1 per square foot and it looked great! I'm not advising to use it in your living room but for the kitchen or bath they are a really inexpensive, quick way to makeover a space.

Martha Finds: Simple fixes for simple foibles
Friday, April 18

Okay, I didn't mean to get your hopes up if you thought I had some remedy for chocolate milk stains (insidious aren't they). But this is a neat way to cover them up.
Embellish a solid-colored shirt with bright butterflies in flight -- and
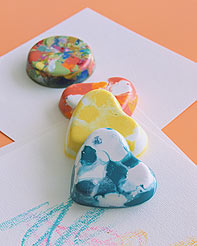 Got crayon crumbles? Try this!
This is such a fantastic idea! Not only do you use the last bits of crayon that were annoying you at the bottom of the crayon box BUT it can also be a fun activity for your kids. Encourage kids to come up with combinations: A blue-and-white blend for drawing the sky, for example, and a mix of reds and oranges for sunsets."
Tools and Materials
Kitchen knife
Old crayons
Mini-cake tins (we used pans with heart- and circle-shaped pockets)

Crayon How-To
1. Parents can use the knife to chop crayons into pea-size pieces, taking care to keep colors separate so kids can combine them as they like.
2. Preheat the oven to 150 degrees while children fill the tin with crayon pieces, arranging them in interesting designs.
3. Bake just until the waxes have melted, 15 to 20 minutes.
4. Remove the shapes after they have cooled. If they stick, place tray in the freezer for an hour, and the crayons will pop out.

I have this problem frequently- A beautiful print (often old navy) dress, no waist. I can usually sew a sash into the dress but if you aren't the seamstress type here's a great idea! A suede hole punched sash. This is great because you there's no fraying and if you buy a sturdier suede material it will hold its shape better. This belt lends itself to variation: Once you get the hang of it, you can even make it without the pattern.
Tools and Materials
1/8 yard of 60-inch-wide fabric|
Hole punch
Yardstick
Erasable fabric marker
Belt How-To
1. Fold fabric in half; place widest part of pattern at the fold. Pin in place with quilting pins, which are long and strong, ideal for heavy fabric like this.
2. Extend the straight lines of pattern to the bottom of the fabric with an erasable fabric marker and yardstick.
3. Cut out the belt. With the hole punch, perforate the edges, positioning holes 1/4 inch apart and 1/4 inch in from the edge.
4. Wrap belt around waist, and tie in back.

This is a great idea if you have a blanket that you don't want to *permanently* alter but would still like to use for grassy outings. You can waterproof a cotton or wool blanket by adding a protective backing of water-resistant fabric such as ripstop nylon or oilcloth, and safely lounge on damp grass.
Waterproof Blanket How-To
1. Cut fabric to the exact dimensions of the blanket, adding 1/2 inch on all sides for hem. Fold edges of backing under 1/2 inch, and place 2-inch-wide twill tape on top; machine-stitch both inside and outside edges of tape around entire perimeter, mitering tape at corners.

2. With a hammer or mallet, fix snaps along edges of the backing and the blanket (snap kits with instructions are available at sewing stores): Center a snap in the twill tape at each corner, then attach snaps at intervals of 10 to 12 inches around the whole border. Attach the "male" half of snaps to the backing first; then mark the placement of the "female" half of snaps carefully on blanket for a good fit, and attach snaps. The backing may be detached when it is not needed.
OR (my idea) if you didn't want to mess with the snap kit you could add a long piece of velcro while sewing the twill tape to the blanket (killing 2 birds with one stone). Just be sure to put the soft side of the velcro to the blanket and the rough side to the waterproof material so that you can reuse the blanket without any course obstructions.
Freecycle Rocks!!!!!!!
Friday, April 11
 Did I ever mention how much I love, love, love freecycle? I know freecycle isn't news to anyone but I just have to shout to the rooftops about my latest conquest (see left). Yes, I got this for FREE! I had driven all over the place, Wal-mart, Target, Toys'r'us. I even went down to the local consignment shop. Everything was either more than I intended to spend, too small or too cheap looking. On a lark, I sent out a freecycle post and within a couple minutes a nice woman had emailed me about a bike that was sitting in her attic, never used. (one caveat, I've been disappointed before by freecycle, I didn't get my hopes up) But when I pulled up to the door, I was breathtaken. Reproduction vintage Radio Flyer tricycle, pristine condition. Oh, it was better than I had thought possible, complete with vintage bell and peppermint striped streamers. As I hauled it off in front of the former owners I was nearly scared they'd realize their mistake and take back their offer. Once I hastily crammed it in my front
 seat after refusing any help I got out of there fast. It is a *little* heavy but I'll deal. Brian loved it too, perhaps *coveted* might be a better description. Anyway, for that slice of the population who don't know about freecycle, just follow the link, type in your location and then go to the sign-up link at the bottom. Be sure to read the instructions. All freecycle groups are different but I've found that most are sticklers for details. This isn't my first fantastic find either. Off the top of my head, I've gotten a baby swing, radio flyer wagon, brand new suitcase and rattan furniture. I've also given away quite a few things, some good, some not so good. One tip, I've found I get better quality when I request something rather than accept something. Don't really know why, just do. Good luck in all your freecycle pursuits!
I'm lazy....so sue me
Friday, March 28

